REDUCCIÓN Y DEFINICIONES EN PIXELART: El Arte de la Simplificación Digital
¿Alguna vez te has preguntado cómo los artistas logran crear imágenes impactantes con tan pocos píxeles? ¿O cómo los icónicos personajes de los videojuegos clásicos cobraban vida en pantallas de baja resolución? Prepárate para sumergirte en el fascinante mundo del pixelart, donde cada punto cuenta y la creatividad no conoce límites.
En este artículo, desentrañaremos los secretos de la reducción y las definiciones en pixelart. Te guiaremos a través de cuatro ejemplos reveladores que te mostrarán cómo la magia sucede cuando los píxeles se convierten en tu lienzo. Y lo mejor de todo: ¡podrás experimentarlo por ti mismo! Descubre cómo un simple ejercicio puede transformar tu perspectiva sobre el dibujo digital y llevarte a nuevos niveles de expresión artística.
Desde los días dorados del Atari y la Family Game, pasando por la era de Sega, hasta los gráficos modernos, el pixelart ha evolucionado, pero su esencia permanece. ¿Estás listo para dominar este arte y crear obras maestras con el mínimo de elementos? ¡Sigue leyendo y prepárate para ver el mundo en píxeles!
Por Martín Lietti
El Desafío de la Reducción: Cuando Menos es Más en Pixelart
La definición en la reducción y ampliación de imágenes es un tema crucial en el mundo del dibujo digital, y dominar esta habilidad puede ser todo un reto. Al reducir una imagen, las líneas tienden a engrosarse, las tramas se oscurecen y los detalles más finos pueden desvanecerse. Es aquí donde entra en juego el arte del balance visual, una habilidad que todo artista digital debe cultivar.
Este fenómeno no se limita al trabajo digital; también se manifiesta en las reproducciones impresas. La dificultad radica en visualizar y calcular con precisión cómo se verá tu obra una vez reducida. Es fácil caer en la trampa de dedicar horas a detalles minúsculos que, lamentablemente, se perderán en la versión final reducida.
Por otro lado, cuando ampliamos una imagen, nos enfrentamos a desafíos diferentes pero igualmente importantes. Pueden aparecer espacios vacíos inesperados, las líneas pueden perder su fuerza y los grises generados por tramas pueden aclararse, alterando la composición original.
Es importante aclarar que estos conceptos no deben limitarte a crear únicamente dibujos simples. La clave está en encontrar un equilibrio entre la expresión artística y la funcionalidad técnica. Disfruta dibujando a tu estilo, añade los detalles que te apasionen y que den personalidad a tus creaciones. Sin embargo, ten presente que en algún momento te enfrentarás a situaciones donde la reducción y la definición serán cruciales.
En lugar de ver esto como un obstáculo, aprovecha para explorar y perfeccionar tus habilidades aquí. Considera estos desafíos como oportunidades para crecer como artista y expandir tu repertorio técnico. La práctica constante te permitirá anticipar cómo se verán tus obras en diferentes formatos y resoluciones, evitando sorpresas desagradables en el proceso de producción.
Recuerda, el objetivo es seguir disfrutando del proceso creativo mientras desarrollas la capacidad de adaptarte a los requisitos técnicos que inevitablemente surgirán en tu carrera artística. Con el tiempo y la práctica, lograrás un equilibrio perfecto entre tu visión creativa y las demandas técnicas del medio digital.
Del Papel a los Píxeles: Una Nueva Perspectiva en la Ilustración
Históricamente, los ilustradores y dibujantes de cómics han trabajado con la reducción de imágenes, ya que los originales suelen ser más grandes que la versión impresa final. Sin embargo, el concepto puede resultar abstracto hasta que te enfrentas a situaciones reales de producción.
Es aquí donde el pixelart entra en escena como una herramienta pedagógica invaluable. La cultura de los videojuegos nos ha familiarizado con diferentes calidades de imagen, permitiéndonos apreciar y entender intuitivamente cómo funciona la definición en píxeles. Esta familiaridad nos brinda un punto de partida accesible para comprender los principios de reducción y definición en el arte digital.
La evolución del pixelart en los videojuegos nos ofrece una línea temporal fascinante para estudiar este concepto. Desde los primeros juegos de Arcade, Atari o Family Game, donde la definición era extremadamente baja (el primer Mario Bros tenía un tamaño de apenas 16 x 32 píxeles), pasando por la era del Sega Genesis y la primera PlayStation, hasta llegar a los juegos actuales con resoluciones de 1920 x 1080 píxeles o más, podemos observar cómo ha evolucionado la representación visual en el medio digital.
El píxel, como unidad básica de composición digital, nos permite crear una infinidad de imágenes dependiendo de la definición que utilicemos. A medida que reducimos la definición, cada píxel gana importancia en relación con la imagen total. Lo que antes era un simple punto para representar un ojo, ahora podría ocupar toda la cara del personaje. Este ejercicio de adaptación y simplificación es crucial para desarrollar tu habilidad de comunicar visualmente con recursos limitados.
¿Quieres llevar tus habilidades de pixelart al siguiente nivel? Descubre recursos especializados aquí. Aprenderás técnicas avanzadas para maximizar el impacto visual de cada píxel en tus creaciones, permitiéndote contar historias complejas con el mínimo de elementos.
Cuatro Niveles de Definición: Un Viaje por la Reducción en Pixelart
Para ilustrar de manera práctica cómo funciona la reducción y la definición en pixelart, te presentaré cuatro ejemplos con diferentes niveles de definición. Te invito a que realices este ejercicio por ti mismo, ya que es una excelente manera de comprender cómo la reducción de tamaño y definición afecta a tu dibujo.
Es importante destacar que cada uno de estos casos ha sido redibujado cuidadosamente. A medida que reduces la definición, cada espacio se vuelve extremadamente valioso, y debes tomar decisiones críticas sobre dónde colocar cada píxel para mantener la esencia de tu diseño original.
1. El Dibujo Original: Alta Definición
Comenzamos con un dibujo simple en alta definición, compuesto por una gran cantidad de píxeles (300 por pulgada). Aunque no lo parezca a simple vista, esta imagen contiene una riqueza de detalles y suavidad en las líneas que las versiones posteriores intentarán capturar con recursos más limitados.
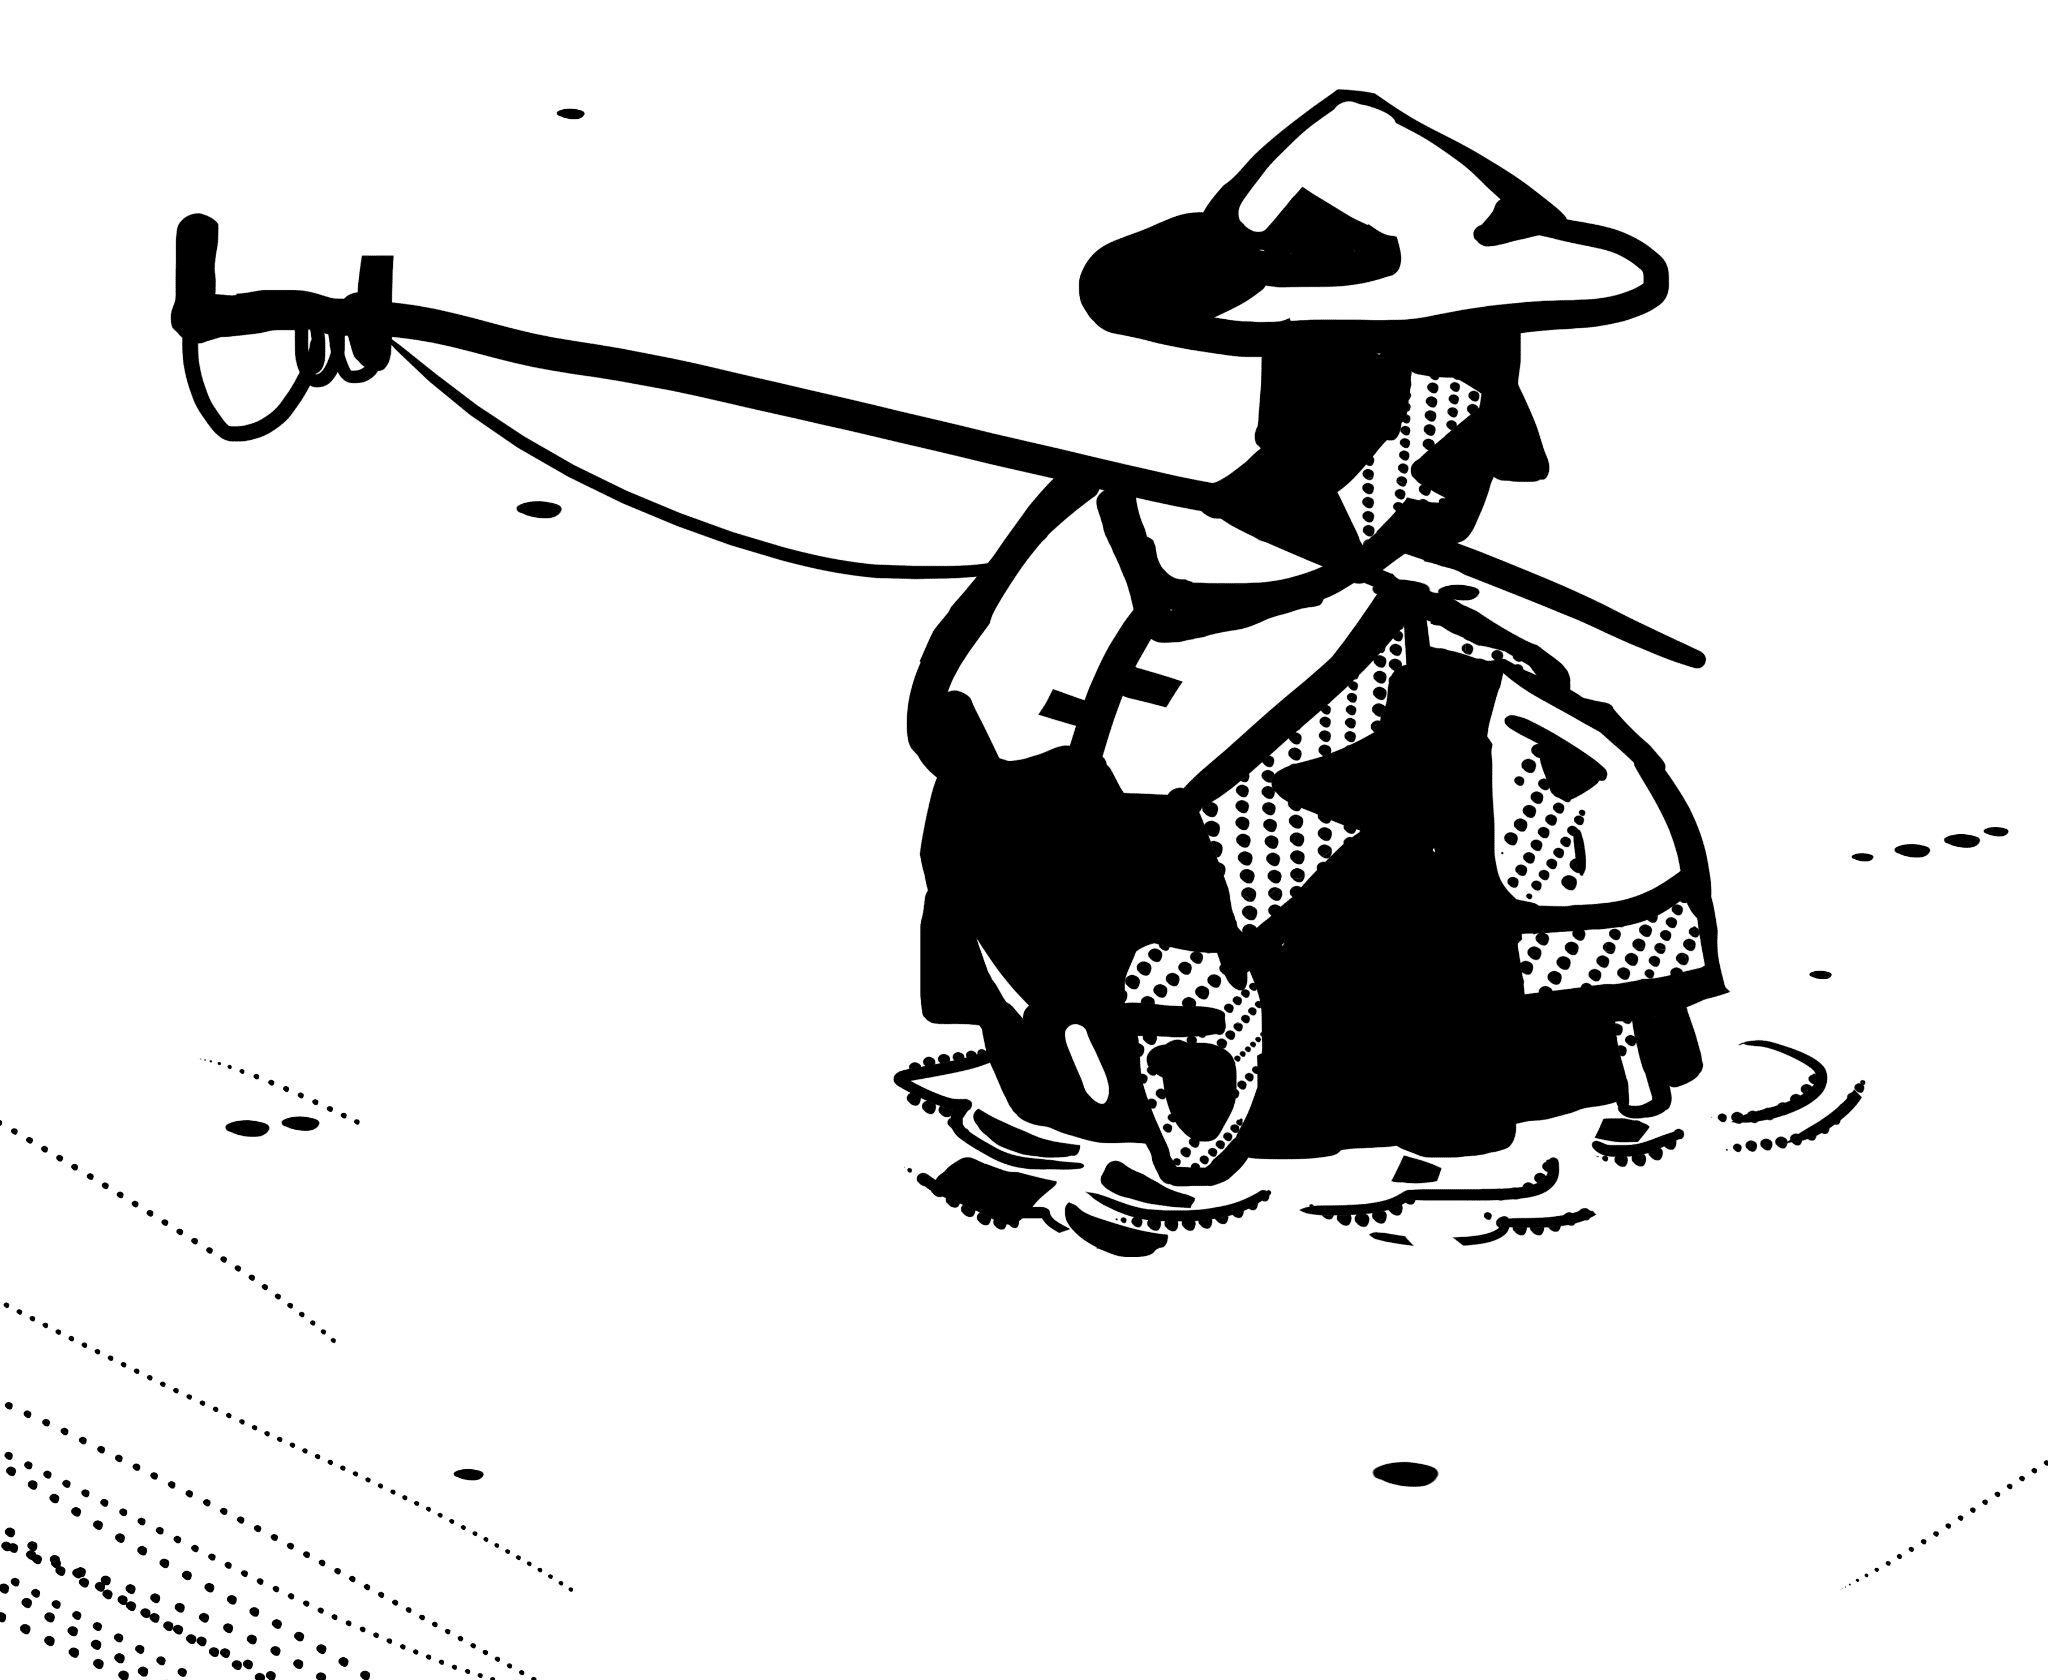
Este será tu punto de partida. La simplicidad del diseño es intencional, ya que un dibujo con demasiados detalles complicaría el proceso de reducción y podría resultar en una imagen confusa en las versiones de menor definición.
2. Primera Reducción: 100×100 Píxeles
En esta primera reducción, trabajarás con una definición de 100×100 píxeles. Aquí es donde comienza el verdadero desafío del pixelart. Notarás que las líneas empiezan a tomar una forma escalonada, ya que los píxeles individuales comienzan a influir visiblemente en la forma del dibujo.
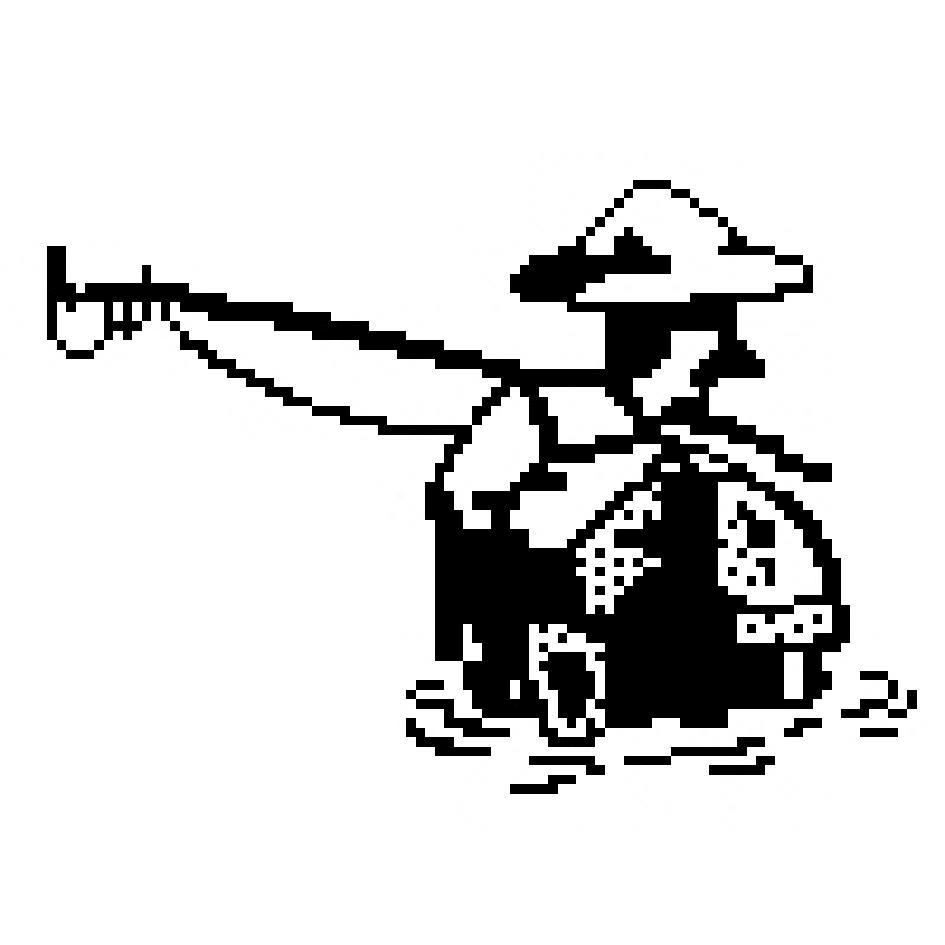

En esta etapa, deberás tomar decisiones importantes:
- Las líneas muy finas pueden perderse o empastarse, así que considera engrosarlas o eliminarlas.
- Los detalles pequeños probablemente tendrán que ser omitidos.
- Para crear diagonales, tendrás que utilizar una técnica de “escalera” con los píxeles.
- Las formas curvas tenderán a parecer más cuadradas debido a las limitaciones de los píxeles.
Este es el momento de decidir qué elementos son esenciales para mantener la identidad de tu dibujo y cuáles pueden ser sacrificados en aras de la claridad.
¿Buscas inspiración para tus proyectos de pixelart? Explora nuestra galería de ejemplos aquí. Encontrarás una variedad de estilos y técnicas que te ayudarán a perfeccionar tu enfoque en la reducción de 100×100 píxeles.
3. Segunda Reducción: 50×50 Píxeles
Ahora pasamos a una definición de 50×50 píxeles, donde la simplificación se vuelve aún más crucial. En este nivel, cada decisión que tomes tendrá un impacto significativo en la apariencia final de tu dibujo.
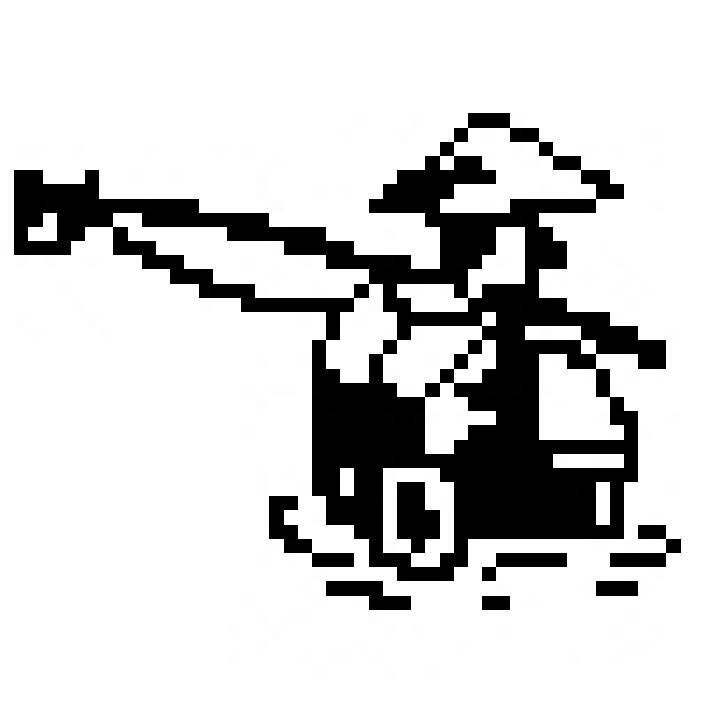

En esta etapa:
- Deberás prescindir completamente de los detalles pequeños.
- Cada píxel que dibujes ocupará un espacio importante en la composición.
- El ancho de cada píxel influirá significativamente en el grosor de las líneas de tu personaje.
- Las texturas o tramas que generaban grises en versiones anteriores probablemente tendrán que ser eliminadas.
Es fundamental que te detengas frecuentemente a observar tu trabajo desde cierta distancia. Esto te ayudará a evaluar si la esencia de tu dibujo original se mantiene y si es necesario agregar o quitar elementos para mejorar la legibilidad.
¿Quieres dominar el arte de la simplificación en pixelart? Descubre técnicas avanzadas aquí. Aprenderás a comunicar más con menos, maximizando el impacto de cada píxel en tus creaciones de 50×50.
4. Reducción Final: 20×20 Píxeles
Llegamos a la versión más desafiante: 20×20 píxeles. En este punto, tu imagen se ha convertido prácticamente en un símbolo o icono. La simplificación alcanza su máximo nivel, y cada píxel se vuelve crucial para la interpretación de la imagen.
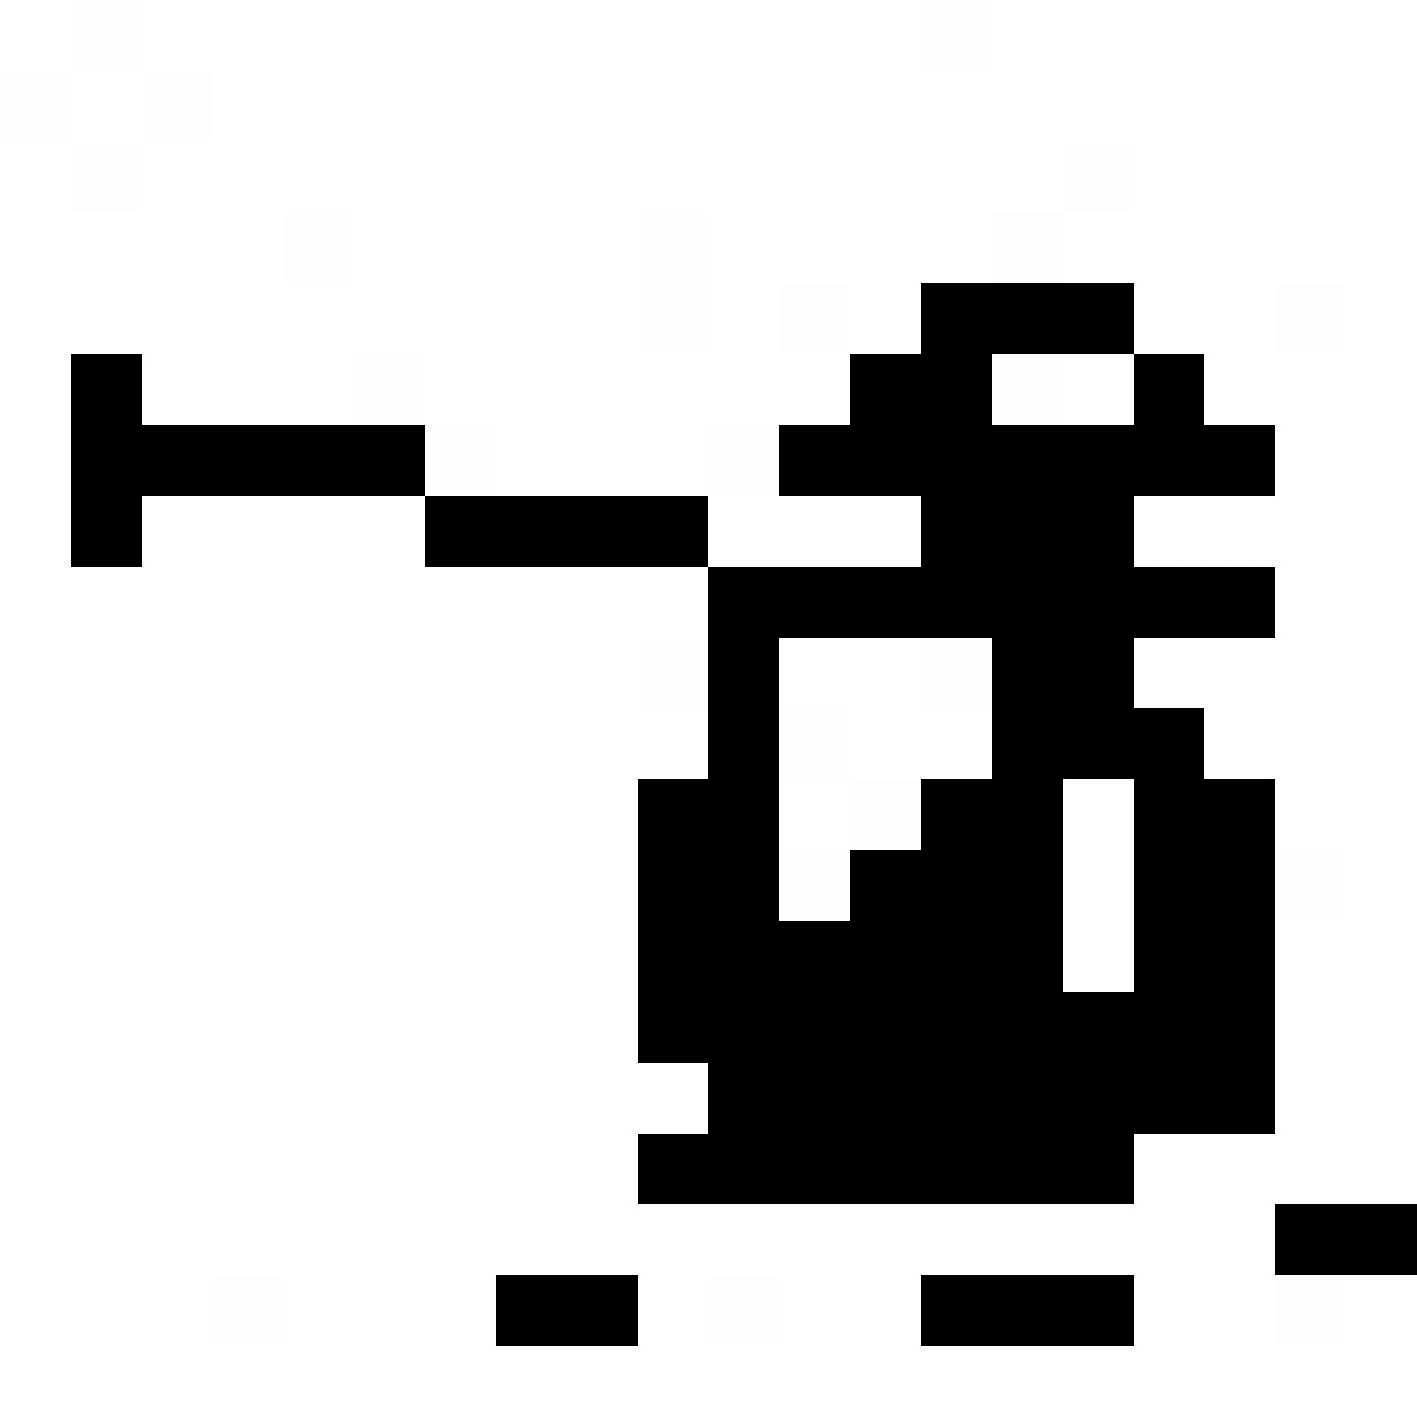

En esta etapa final:
- Ya no existe la línea de contorno; trabajarás únicamente con planos negros y blancos.
- Cada elemento debe ser colocado con extrema precisión para que la imagen original sea reconocible.
- Grandes áreas de tu dibujo pueden quedar reducidas a bloques de color (como la cara totalmente negra o la mochila en blanco y negro).
- El desafío está en mantener la esencia y reconocibilidad del dibujo original con recursos mínimos.
Este ejercicio de reducción extrema es invaluable para desarrollar tu capacidad de comunicar visualmente con el mínimo de elementos. Te obliga a identificar las características más esenciales de tu diseño y a encontrar formas creativas de representarlas con solo unos pocos píxeles.
¿Listo para llevar tu pixelart al extremo? Explora técnicas de micro-pixelart aquí. Descubrirás cómo crear íconos impactantes y reconocibles utilizando solo 20×20 píxeles o menos.
Lecciones del Pixelart: Aplicaciones en el Mundo Real
Aunque este ejercicio se centra en el pixelart, las lecciones que aprendes son aplicables a una amplia gama de disciplinas artísticas y de diseño. La capacidad de simplificar y adaptar tu trabajo a diferentes resoluciones y tamaños es una habilidad invaluable en el mundo digital actual.
En la impresión, por ejemplo, las imprentas tienen limitaciones similares en cuanto al ancho mínimo de línea que pueden reproducir. La fibra del papel puede causar que las áreas con mucha tinta se ensanchen, lo que puede resultar en la pérdida de detalles finos. Comprender cómo se comporta tu diseño en diferentes resoluciones te ayudará a crear obras que se traduzcan bien tanto en formato digital como impreso.
Este ejercicio de reducción y definición es particularmente útil en campos como:
- Ilustración: para crear obras que se vean bien tanto en pantalla como impresas
- Diseño de cómics: para asegurar que los detalles sean legibles en diferentes formatos de publicación
- Diseño de logotipos: para crear marcas que sean reconocibles incluso a tamaños muy pequeños
- Diseño de interfaces de usuario: para desarrollar iconos y elementos gráficos que funcionen en diversas resoluciones de pantalla
- Animación: para entender cómo simplificar personajes y escenarios manteniendo su esencia
La práctica constante de este ejercicio no solo mejorará tu habilidad técnica, sino que también agudizará tu ojo crítico. Aprenderás a identificar rápidamente qué elementos son esenciales en una composición y cómo comunicar ideas complejas con recursos limitados. Esta habilidad es invaluable en cualquier campo del diseño visual.
¿Quieres aplicar las lecciones del pixelart a tu arte digital? Descubre cómo aquí. Encontrarás recursos para trasladar las habilidades de simplificación y adaptación a diversos proyectos creativos.
Conclusión: El Arte de la Síntesis Visual
A lo largo de este artículo, hemos explorado el fascinante mundo de la reducción y definición en pixelart. Desde los conceptos básicos hasta los desafiantes ejercicios de reducción, has tenido la oportunidad de sumergirte en un proceso que es tanto técnico como creativo.
Los cuatro ejercicios con diferentes definiciones de pixelart que hemos presentado no son solo un pasatiempo divertido; son una poderosa herramienta de aprendizaje. Con la práctica constante, no solo mejorarás tu habilidad para crear pixelart, sino que también desarrollarás una comprensión más profunda de cómo funciona la reducción y ampliación en el arte digital en general.
Recuerda que el verdadero valor de estos ejercicios radica en su aplicación práctica. Cada vez que te enfrentes a un proyecto que requiera adaptación a diferentes formatos o resoluciones, podrás aplicar las lecciones aprendidas aquí. La capacidad de simplificar sin perder la esencia es una habilidad que te distinguirá como artista y diseñador.
Te invito a que vuelvas al principio del artículo si necesitas repasar algún concepto o si deseas practicar los ejercicios nuevamente. La maestría en el arte de la síntesis visual solo se logra con la práctica repetida y la experimentación constante.
¿Estás listo para llevar tu arte digital al siguiente nivel? Haz clic aquí para descubrir recursos avanzados y tutoriales que te ayudarán a perfeccionar tus habilidades en pixelart y más allá. Recuerda, cada píxel cuenta, y con las herramientas y conocimientos adecuados, puedes crear obras maestras en cualquier resolución.
¡Hasta la próxima, y que tus píxeles siempre cuenten una historia fascinante!

